Hiking Workout Routine to Get Trail-Ready in 2 Weeks (+ Free PDF Guide!)
Knowing exactly what workout routines will get you in shape for the summer hiking season can be confusing- so I’ve broken down my favorite exercises. In this post I’m going to break down exactly what hiking workout routine will get you in the best shape for the trail this summer, so that you’ll be ready to take on the hardest hike on your list in no time. I’ll go over the best workout exercises, give you a 2 week plan that you can download and print for FREE so that you can take it on the go.

Some of the links on this site are affiliate links, meaning I may earn a small commission if you make a purchase through them, at no additional cost to you. Thank you for your support!
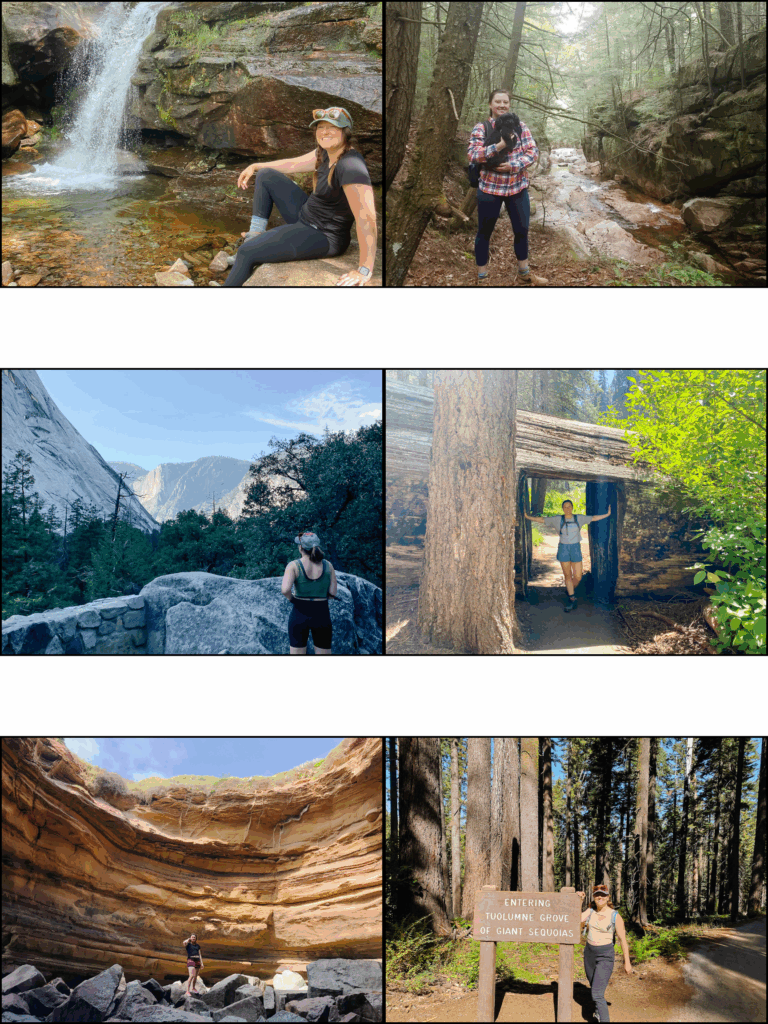
I recently finished my first hike of the season in New Hampshire’s White Mountains, and I quickly learned that spin class just isn’t going to cut it.
Only a few hours in my hip flexors were screaming, the outside of my glutes were fired up, and my calf muscles were cramping. It took me a full 3 days just to feel like I could walk normally again!
After that experience I did a deep dive on what compound exercises and stretches I need to add to my workout routine so that the next time I hit the trail I have a better experience and it doesn’t take me literal DAYS to recover.
With that in mind, let’s get into these killer workouts that are going to help you crush your next hike!
🎒 P.S. I created a free 2-week workout tracker you can download and take to the gym or trail with you!
Looking for more tips on how to get in shape for hiking? Check out this blog post where I give you 11 top tips.
Workout Routine Ideas
The hiking focused exercises that I’m going to share below can be incorporated into a full exercise routine in a couple ways, depending on your goals and the time you have to spare.
How you create your workout routine is entirely customizable! You could do a 3 day weight training program with day 1 being legs, day 2 being core, and day 3 being upper body.
If you’re looking for a HIIT style workout you could do each category of exercises like a circuit, again as a 3 day training program.
Here’s an example of a 3 day strength training program:
Day 1: Lower body
Day 2: Upper body
Day 3: Core
Day 4: Cardio. Pick one of the following:
- Spin class
- Power Yoga
- Sprint circuits
- Long run/jog/cycle/swim
Day 5-7: Stretch and recovery
Week 1 you should focus on less weight and getting the form correct, and then week 2 you can increase the difficulty and the weights.
To help you keep track of your progress I’ve created a free downloadable tracker!
Lower Body Hiking Exercises

Hiking Exercise #1: Weighted Lunge
10-15 reps each side x 3 sets
This is going to help you build up quad strength to take you up all the hills and all the mountains. 500 foot elevation gain in .3 miles? You’ve got it!
Tip:
When just starting out, try it with no weights. As you build up strength add some dumbbells.
variations:
A forward lunge will keep the front quads engaged.
A reverse lunge will engage your glutes and your hamstrings.


Hiking Exercise #2: Weighted Calf Raises
10-15 reps x 3 sets
Time to beef up those gorgeous calves. Like the lunges, start with no weight and add dumbbells to your shoulders as you build up strength. For the full range of motion, stand on a porch or a raised surface like a box or stool. Be mindful of your balance!

Hiking Exercise #3: Bulgarian Split Squats
10-15 reps each side x 3 sets
This exercise will wring your quads to your bone- they seriously burn! An easier variation is to skip the raised leg and keep both legs on the ground. To get the full effect here you want to make sure your upper body is straight, shoulders relaxed down your back, core tight, front knee over your front ankle, and your back bent leg DIRECTLY over your hips and knees. You should feel the burn primarily in your back quad.


Hiking Exercise #4: Skater Lunges
30 seconds x 3 sets
Skater lunges are a great way to incorporate some cardio and dynamic movement. This exercise does a great job incorporating your core, low back, and your quads. Begin in a standing position with your feet hip width apart. Then move your right foot behind your left ankle while reaching your right hand down to your left ankle. Then do a slight hop to your right foot as your left foot comes behind your right at an angle while brining your left hand down to your right ankle. Repeat.

Hiking Exercise #5: Standing Single Leg Kick and Touch
30 seconds each side x 3 sets
I’m not sure what to call this exercise, but it’s another great dynamic workout that incorporates balance. Begin by standing on one leg and keep the opposite hand free in mountain pose. Extend one leg back as you bend at the waist and touch the ground with the opposite hand. Hinge back up to standing as you swing that same leg forward to a kick. Repeat. To increase the challenge, add a weight in the hand you’re touching to the ground.
Upper Body Hiking Exercises

Hiking Exercise #1: Renegade Rows
30 seconds x 3 sets
Who doesn’t love a plank? Starting in a high pushup position, grab some dumbbells and alternate arms as you pull each weight up, making sure that you really squeeze your shoulder blades together at the top.


Hiking Exercise #2: Elevated Pushup
30 seconds x 3 sets
Grab a yoga block, a wall, or a bench and perform a push up against it. An elevated pushup like this will give you a wider range of motion, allowing you to deeply engage your shoulder and chest muscles. I think it’s slightly easier than a traditional pushup as well. Make sure you’re engaging your core!

Hiking Exercise #3: Shoulder Press
10-15 reps x 3 sets
Making sure you keep your core tight, back straight, and add a slight turn inward on your way up. Also keep an eye on your elbows- you don’t want them to drop below your shoulders. This will keep the shoulder muscles engaged and your elbows safe. Keep your chin slightly tucked as you look straight ahead. Option to perform this sitting or standing.

Hiking Exercise #4: Up-Right Rows
10-15 reps x 3 sets
A real shoulder burner, this will whip you into shape for using your trekking poles! Standing in an upright position with your legs about hip distance apart, engage your core and take your dumbbells in an overhand position. Use your traps and your shoulders to bring the dumbbells up towards your chest, keeping your elbows wide. Slowly lower back down and repeat. See video below for a full breakdown of my favorite shoulder workouts:

Hiking Exercise #5: Tricep Kickback
10-15 reps x 3 sets
With a single dumbbell, hinge slightly at the waist so that your upper body is at a slight slant forward. Keeping one elbow bent, keep your upper arm nice and steady as you kickback the dumbbell back. Make sure your core is engaged to support your back here, and make sure you squeeze your triceps as you bring your arm all the way back. Here’s a full breakdown:
Core Hiking Workouts

Hiking Exercise #1: Weighted Deadbugs
10-15 reps x 3 sets
Deadbugs are an excellent core killer that will get you ready to haul that pack up the mountain for hours. Option to make this harder by adding dumbbells. Keep your core engaged and start on your back with your legs bent at the knees, make sure your lower back is GLUED to that mat- even if that means not lowering your leg as much.

Hiking Exercise #2: Russian Twists
30 Seconds x 3 sets
Keeping your core engaged with your shoulders and upper back off the mat, balance on your low back and glutes as you rotate from side to side. Options to make it harder include lifting your feet off the ground or adding a weight.

Hiking Exercise #3: Toe Taps
30 Seconds x 3 sets
Using the same set up as your deadbug, start on your back with your legs bent at the knees, keeping that low back GLUED to the mat. Alternate your legs as you tap your toes to the ground and then return to the dead bug position. Options to make it harder include lifting your shoulders off the ground, and as you tap your feet further away that increases the challenge.

Hiking Exercise #4: Side Planks
15 Seconds each side x 3 sets
Begin in a high plank positon. Move one hand towards the center of the mat as you rotate your hips onto your side, keeping your feet stacked on top of each other or one in front of the other. Lift your hips up and keep your core engaged as your obliques take on the challenge.
Variations:
Variation #1:
easier
Make it easier by dropping your bottom leg to the mat. Make sure you’re still engaging your core- you can drop down to this at any point instead of just giving up!
Variation #2:
Harder
Make it harder by lifting your top leg. With your bottom leg up or down, lifting that top leg and keeping it up or ppulsing it up will engage your outer quads.
Variation #3:
Harder
Add a twist of your upper body to engage your oblique muscles. Reach your top arm up toward the ceiling, and then rotate it towards the front of of your body to reach the mat underneath your ribs. Reach back up towards the ceiling and repeat.

Hiking Exercise #5: Plank Toe Taps
30 Seconds x 3 sets
Returning to a high plank position, begin to alternate your left and right foot extending to the side for a toe tap. Option to include cardio by speeding this up as you jump and do left and right toes at the same time.
Active Recovery Days
Choose 1-3 days/week of recovery activities if doing a multi-day plan.
Recovery after three intense workout days is essential—after my first hike of the season, even with solid cardio training, my calves were screaming, and my ankles and knees took a beating; without proper recovery, those small aches can turn into bigger injuries. I’ve included some of my favorite ways to take an active recovery.
Yin Yoga
Yin yoga is focused on holding passive postures for a long period of time, allowing the stretch to extend to the connective tissues including fascia, ligaments, and joints. Yin yoga helps improve flexibility and mobility, especially in the hips, pelvis, and lower spine. All areas of the body that play an important part in hiking adventures.
Remember to focus on your breathing as you’re holding these postures for 1-5 minutes, or as long as you’d like. Take your time coming out of the posture, and take time between each pose to relax, breathe, and take a pose that is opposing to the one you just did.
Postures can be held for 5-20 deep breaths, but at least 5 yogic breaths are needed to feel the stretch in the connective tissues.
I suggest spending about 30 mins focused on glutes and quads. Props can really help get into the postures- see my recommendations below.
Yin Yoga Flow – quad and glute focus


Half Pigeon – Come into a plank pose and bring your left leg up under your wrists with your right leg extended behind you. You can either support your upper body on your finger tips as pictures above your you can lower your chest down to the ground. Repeat on the other side.
Figure Four – Laying on your back, bring your left ankle to cross on the top of your left knee. You can then stay like this or bring your right leg up into your chest as you use your hands to hug your leg in. Repeat on the other side.
Cat Grabbing its Tail – Laying your back, extend your left leg to the side of your body as your right leg stays connected to the ground, bending your knee as you reach with your left hand to grab your toes. Your gaze is toward to the right foot. You can stay in an upright position as pictured, or you can lower your upper body toward the ground for an additional challenge. Repeat on the other side.


Hip Flexor + Ankle Strength Exercises
Hip flexor and ankle strength exercises are essential for hiking because they improve stability, balance, and endurance on the trail. Your hip flexors will help you lift your leg up tall rocks and steep terrain, while your ankles will help you with the rest. building strength and flexibility in your hips and ankles will help you take on harder trails and will help make multi-day hikes less painful.
I also suggest using a foam roller on your back and your quads after a hard workout.


Gentle Hike or Nature Walk
30–60 mins in the woods or neighborhood trail. Keep it easy and intentional, and I would suggest avoiding big uphills. Remember, this is a recovery! I suggest going outside because it will keep you motivated and focused on what this is all about- hiking that challenging hike without the agony!

This plan is designed to get your muscles ready for real-world movement on the trail. Focus on control, full range of motion, and recovering with purpose. Don’t skip the foam roller — your calves and hip flexors will thank you.
Pin for Later!